Understanding How Sand Casting Works
Sand casting is a manufacturing method that uses sand to create complex mold shapes. It is similar to metal casting. The only difference between these two manufacturing techniques is that instead of metal, sand is used in this process. In this post, we discuss how the sand casting process works.
How does sand casting work?
Below is an explanation of how sand casting works;
Step 1: Fabrication of the foundry pattern
The foundry pattern is the replica of the casting exterior. The role of the foundry pattern is the creation of the sand mold for the final product. It can be made from varying materials. However, the most common materials used are wood or plastic. The pattern is usually made to be oversized. This characteristic allows the metal cast to shrink when it cools down. The foundry pattern can potentially be reused after the final part is manufactured. However, this depends on the material of the pattern. More often than not, you have to create two patterns to be used where interior contours are needed.
Step 2: the making of the sand molds
The foundry patterns made in the first step are used to create the sand molds. The sand mold is usually made in two halves. One half of the mold is made using one pattern, and another side is made using the second pattern. However, it is worth mentioning that the molds do not have to feature two parts. The making of the sand molds is quite complex and requires special attention. This is primarily because the sand mold affects the outcome of the sand casting process.
Step 3: clamping of the drag and cope together
Clamping of the drag and cope together helps make the mold complete. More often than not, the core is placed into the mold before the clamping. This is especially the case if internal contours are required. During this step, all the elements of the mold are also checked, and their quality assessed.
Step 4: melting of the material
Once the mold is complete, the desired final material is melted. This step occurs within the furnace. Once it is melted to completion, it is then poured into the mold. The molten material is poured into the mold’s spruce, where it conforms to the cavity.
Step 5: Cooling and removal
The molten material is left to cool within the cavity. After it has cooled completely, the sand is removed from the mold. This can be done through vibration or waterjets, among other non-destructive techniques. The process is known as the shakeout. Once there is no more sand in the mold, the final part is revealed.
Step 6: cleaning
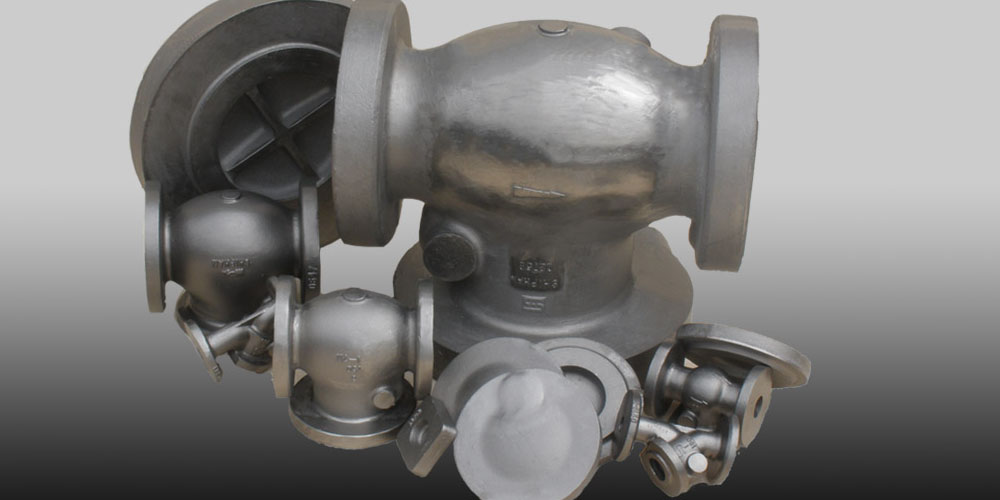
The final step is the cleaning of the final product. Here, the part is not only cleaned but is also refined to its final shape. The gating system and runners are also removed at this step. The product is polished then inspected for defects.
Final word
The process may differ depending on the intended final product. It may also vary from one manufacturer or brand to the next. Regardless, the steps mentioned above are standard parts of the sanding process.